

Can Brake Buddy 3 directly to 12V RV Plug
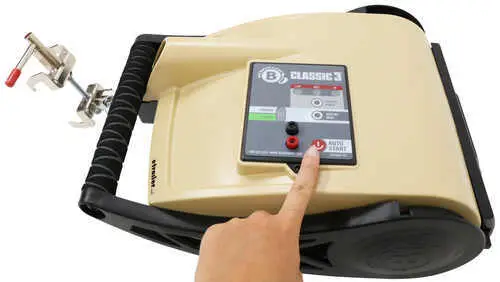
An additional braking device made for using with tow trucks is called the Brake Buddy 3. When the RV brakes, the Brake Buddy 3 activates the brakes on the tow vehicle by using the tow car’s brake pedal.
Since the gadget could take too much current and overload the RV’s circuit, it is typically not advised to connect a Brake Buddy 3 or similar device directly to a 12V RV socket.
Before connecting the Brake Buddy 3, you must first be aware of the specifics so that you may fix them immediately and prevent further harm to your RV.
What Sort of Issues Might Arise If I Connect The 12v RV Straight to The Brake Buddy 3?
In the absence of an additional braking system, difficulties might arise if you connect a Brake Buddy 3 or similar device straight to a 12V RV outlet.
Overloading the Electrical System of the RV:
The circuit in the RV may overload if the Brake Buddy 3 uses excessive current. This might lead to blown fuses or frayed wire in the RV’s electrical system.
Due to the possibility of fires caused by overheating or defective wiring, it may potentially pose a safety risk.
Terrible Performance:
The Brake Buddy 3 might not work as intended and might not offer the degree of braking assistance you want when towing a vehicle without a suitable auxiliary brake system.
Due to this, it may be challenging to safely stop or slow down the towing vehicle and RV, especially in an emergency.
Short Circuits:
The Brake Buddy 3 might result in short circuits or other electrical issues with the RV’s electrical system if it is not connected or installed properly.
The electrical components of the RV may be harmed as a result, which might pose a danger to people.
Challenges with Compatibility:
Although Brake Buddy 3 systems are made to operate with a variety of RVs, they might not be compatible with all RV models.
System Calibration and Setup Being Difficult:
The appropriate setup and calibration of the Brake Buddy 3 system could be necessary.
You could have some trouble getting the system set up and calibrated properly if you are unfamiliar with this procedure.
Fewer Possibilities for Mounting:
You might only have a few alternatives for attaching the Brake Buddy 3 control unit and actuators depending on the layout and style of your RV.
This may make it challenging to put the equipment in a practical spot.
What Procedures Are Necessary to Install Brake Buddy 3 In A 12v RV?
The standard procedure for installing a Brake Buddy 3 system in an RV is as follows:
1. Read and Comprehend the Installation Guidelines:
The manufacturer’s instructions must be thoroughly read and understood before you start the installation procedure.
In addition to any safety considerations or warnings that you should be aware of, these instructions will give comprehensive information on how to install the Brake Buddy 3 system.
2. Setup the Equipment and Supplies:
Installing the Brake Buddy 3 device in your RV only a few simple supplies and equipment.
Tools and supplies such as wire strippers, drill bits, wrenches, screwdrivers, and electrical tape may be included in this.
3. Find an appropriate spot to mount the control unit:
The heart of the Brake Buddy 3 system, the control unit, is usually situated on the towing car.
You must choose a good mounting place for the control unit that is close to the brake pedal and within the driver’s easy reach.
4. Connecting up the Control Unit:
Using the mounting hardware and connectors included with the system, you must install the control unit once you have chosen a position that is appropriate for attaching it.
Usually, the mounting hardware that comes with the system is used to attach the control unit to a bracket.
5. Install the Actuators:
The parts of the Brake Buddy 3 system that apply the brakes to the towed vehicle are called actuators.
Using the mounting hardware and connections included with the system, you must link the actuators to the RV’s brake pedal or brake lines to complete the installation.
6. Connect the Actuators and the Control Unit:
Using the included wire harness, you must connect the control unit and actuators after installation.
Normally, to do this, the harness is first fastened to the control unit, and then it is run to the actuators.
7. Calibrate and Adjust the Brake Buddy 3 System’s Setting:
Adjust the Brake Buddy 3 system’s settings and calibration. Brake Buddy 3’s setup and calibration are the last steps in the installation procedure.
Usually, this entails carrying out a number of procedures indicated in the installation instructions, such as adjusting the brake sensitivity and turning on the system.
What Equipment Is Necessary To Install The Brake Buddy 3 In A 12v RV Plug?
The following equipment is required to install a Brake Buddy 3 in a 12V RV plug:
- Screwdriver: This will be used to fix the Brake Buddy 3 in position and to remove the panel covering the wiring in the RV.
- Wire Stripper: Wire insulation will be stripped from the wires in the wiring harness of the RV using a wire remover.
- Wire Connectors: The Brake Buddy 3 will be connected to the wiring harness of the RV using wire connections.
- Electrical tape: This will be used to seal off the wire connections from moisture and insulate them.
- Drill: Using a drill, mounting screws will be made and the Brake Buddy 3 will be attached to the RV.
How Should Brake Buddy 3 Be Maintained Properly?
A Brake Buddy 3 must be properly maintained in order to operate safely and efficiently. Here are some recommendations for caring for a Brake Buddy 3:
- Observe the maintenance schedule: For prolonged usage, it is essential to adhere to the plan consistently.
- Lubricate the components: Lubricate often to keep everything operating smoothly, but don’t use them excessively.
- Clean up the brake friend: Keep it clean by wiping away any dirt or debris with a gentle cloth or brush.
- Remove any worn-out parts: Replace any worn or damaged elements of the Brake Buddy 3 as soon as you can if you observe any wear or damage.
READ ALSO: 6 Common Issues with Winegard Air 360 and Their Fixes
Frequently Asked Questions (FAQs) Can Brake Buddy 3 directly to 12V RV Plug?
What is the mechanism behind the RV Brake Buddy 3 system?
An RV Brake Buddy 3 system works by applying pressure to the towing vehicle’s brake pedal when the RV’s brakes are engaged through a control unit and a hydraulic actuator.
How many amps does an RV require to run a Brake Buddy 3?
Depending on the type and manufacturer, the current specifications for a Brake Buddy 3 or similar gadget will vary.
How does the Brake Buddy 3 in the RV know when to apply the brakes?
When the brake pedal is depressed, the Brake Buddy 3 system’s control unit, which is attached to the towing vehicle’s brake pedal, activates a sensor, which then put the brakes on the RV being pulled.
In what location does an RV plug in a Brake Buddy 3?
Typically, the Brake Buddy 3 control unit is located in the towing vehicle, and the actuators that apply the brakes on the towed vehicle are positioned on the towed vehicle’s brake pedal and/or brake lines.
